
I’ve been writing songs for over 20 years, and this is the framework I use to beat writer’s block, stay on task, and finish my song idea.
I’ve found most “how to write a song” type content on the internet gives vague advice or tries to upsell you on a songwriting course.
These tactics keep you from actually making great music, and I hope this article will kickstart your songwriting journey today.
Follow these five simple steps alongside me, and by the end of this article, you will have a completed song.
Not only that, but you can publish it to Soundcloud and share it with your friends and family and blow them away with your awesome new skill.
Remember, all it takes is one song to change the world, so let’s dive in!
Table of Contents
Step #1: Start By Finding a Vibe
Goal: To build a loop you can start crafting your song with.
Choose Your Instrument
The hardest thing to do in any activity is to start the process. The same holds true with writing music.
It can be challenging to start songwriting staring at a blank page.
This holds especially true if you do not have any skills in playing an instrument (don’t worry, I’ll have an easy solution for you!)
When you learn how to write a song the best way is to come up with the initial chord progression.
Find a few chords that feel “right” when you play or hear it.
“You start with the concept and build from there, whether it’s a beat or a guitar part.” – Jack Antanoff.
So let’s pick up the tempo and jump-start our creative process by choosing an instrument or tool for writing a chord progression and musical vibe.
Acoustic Guitar

If you are trying to write a more stripped-down, emotional, and intimate song, a great place to start is to write songs with an acoustic guitar.
The tone of an acoustic guitar lends itself well for storytelling and for capturing intimacy in lyrics.
However, there is a challenge with starting with an acoustic guitar for your songwriting process.
Acoustic instruments are unforgiving when it comes to recording your chord progression idea.
It generally takes a good microphone and an excellent acoustic space to accurately represent the sound.
This shouldn’t hold you back if you have chosen an acoustic guitar as your instrument. Just be aware that some of the following steps will be a bit more challenging.
Electric Guitar

This is one of my favorite instruments for crafting my chord progression. There is endless variety in the tones you can create.
It’s also straightforward to record your ideas because most audio interfaces have direct input for guitars. Also, software amp technology these days is excellent and neighbor-friendly.
Also, many Digital Audio Workstations (DAWs) have effects plugins that you can use to really tweak the sound into something inspiring and fresh.
This endless tweaking can also be mean trouble because you can get lost in finding the “perfect vibe” and not proceed with your arrangement.
Try and keep it simple, and don’t overthink it.
Keyboard

Pianos are the complete package for creating a great song idea. Pianos are a naturally beautiful and inspiring instrument and can be relatively easy for beginners to get started on.
Suppose you have access to a MIDI keyboard. In that case, you can also use synth sounds that come with most DAWS to really explore the sonic possibilities for inspirational song ideas.
HookTheory’s Hookpad
This one is by far my favorite!
Hookpad cloud software allows anyone who desires to write a song the ability to do so. You don’t need to spend years learning an instrument, music theory, or having to outsource parts to another musician.
This option is by far the easiest way to cycle through a rough idea and compose your own songs fast.
Hookpad is intuitive and straightforward. You can even export out the MIDI file to import a song idea into a DAW where you could manipulate the sounds further.
It’s as simple as cycling through different chord progressions and choosing the one with the emotional tone that resonates with you the most.
To read my full review of Hookpad, please click here.
Key Signatures, Time Signatures, Beats Per Minute
Once you have the initial chord progression you will work with to build your song, you should experiment with different global song elements.
When your searching for inspiration in the beginning stages of your writing process, you may not give much thought to what time signature, key signature, or tempo you are playing in.
This is a great time to experiment and see how these three elements can alter your song’s mood.
Choosing a Tempo
Speed in music is called Beats Per Minute (BPM).
- 120-160 bpm (Up-Tempo)
- 80-120 bpm (Mid-Tempo)
- 50-80 bpm (Ballad)
Faster songs generally need less “vocal chops” and more “vocal attitude.”
The melody will usually have more immediate delivery and less movement between notes.
So if you have limited vocal range, a faster song may be the best place to start.
Ballads soar with the vocals. Ensure your vocal delivery can captivate an audience or the song will fall flat.
Ballads generally have more sustained notes and space. So there is no hiding in this BPM range!
Mid-tempo songs are the perfect balance between the two. You will get a sense of the lyrics and melody but still, have enough movement to keep those who listen bopping their heads and singing along.
Choosing a Time Signature
In modern pop music, the most common times signatures are:
- 4/4
- 3/4
- 6/8
- 2/4
We aren’t getting into music theory in this post, but it’s essential to know how these time signatures affect the song’s vibe.
4/4 (also known as “Common Time”) is the most widely used rhythm in popular music today. It’s also the easiest to write in. The beat is divided into four beats in the measure:
Count with me…

This feels natural for most people because it’s how people think when counting out simple rhythms.
We tap our feet or clap our hands in 4/4.
The 4/4 time signature works well for all song tempos.
3/4 time is also known as “waltz time.” It’s an easy time signature to write in and has a unique swagger.
Now Count with me again…
“One, Two, Three.”
This will feel natural for people who have danced a lot of waltzes or foxtrots.
A songwriter using this time signature may create a more “relaxed” song vibe. It works well with slow songs like lullabies or ballads.
6/8 time is a lot like 3/4. The main difference is 6/8 gets two dotted quarter notes while 3/4 gets three-quarter notes.
Don’t worry if you don’t know what that music theory mumbo-jumob means.
Just say out loud right now:
“One, Two, Three, Four, Five, Six.” (repeat over)
Now notice the difference when you count:
“One, Two, Three” (repeat over)
Much different vibe, right?
This time signature works well for mid-tempo songwriting and will give a “lighter,” less intense feel. This is because the sway of each note feels more pronounced than with other signatures.
2/4 time signature is known as “march time.” This signature is excellent for upbeat songwriting. If you wish to create music with forwarding motion and a “driving vibe,” this is a great option.
To understand the feeling of this signature, repeat after me:
“Left, Right, Left, Right.”
Just like marching songs.
Rhythm is a huge topic on its own. If you want to take a deeper dive into rhythm on how to utilize it for your songwriting, please refer to my article “Everything You Need To Know About Rhythm in Music As a Songwriter.”
Choosing a Key

Getting the key signature correct from the beginning is important.
You may have some chords you came up with on a piano or guitar that feels great. However, if it’s in the wrong register for you, then your song is destined to fail.
Simply put, you will strain in your singing if the chord progression creates a melody that is out of your range.
Don’t make the mistake of just putting some chords together that feel great and moving forward with the piece.
You might run into issues with your performance when you start getting to sections that demand higher or lower notes. Make sure that your vocal range can be dynamic without pushing your voice.
Feel comfortable singing at least two octaves with the progression and move on.
Listen to how the same chords relative to the key sound different:
Record the Idea
Now that we have our initial song idea and vibe, we need to capture it. We need something that we can loop (repeat over and over) to start writing melodies and lyric writing.
On Phone
The simplest way to record your idea is by pulling out your phone and using it’s built-in recording app.
Using your phone is great for capturing inspiration when it strikes. However, suppose you want to further develop your song with layers and vocals. In that case, you will have to import it into your computer.
This can be a problem later in writing your song because the audio can be bad, and the tempo might have a lot of variation.
This will make editing more difficult (if not impossible).
In Digital Audio Workstation
This is my preferred method to write songs. When you record directly into a Digital Audio Workstation, you capture your ideas in an environment with built-in editing and mixing tools.
This will help you write your song and also do light production. Being able to polish your music will help your confidence. This is vital to you finishing and releasing your music to the world.
There are many free DAW’s that you can use that have more than enough features to get you a professional-sounding song.
Apple has Garageband.
PCs have Audacity.
Completion Steps: Making it Sound Pro
There is a big trap that musicians can fall into during this process of writing music. This is to try and capture the “perfect take.”
Look, we live in a day and age where most hit music you hear on the radio has been heavily edited. There is no shame in getting a “good enough” take and then editing it to make it great.
The level of complexity changes depending on if you are working with real audio (you recorded with an actual instrument) vs. MIDI information.
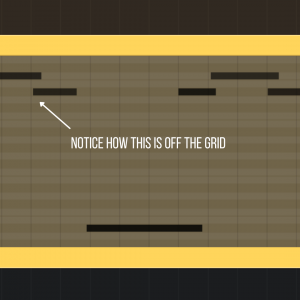
Quantization
If you are working with MIDI, fixing your performance is super easy. Simply select your notes, go to your DAW’s quantizing feature, and “snap it to the grid.”
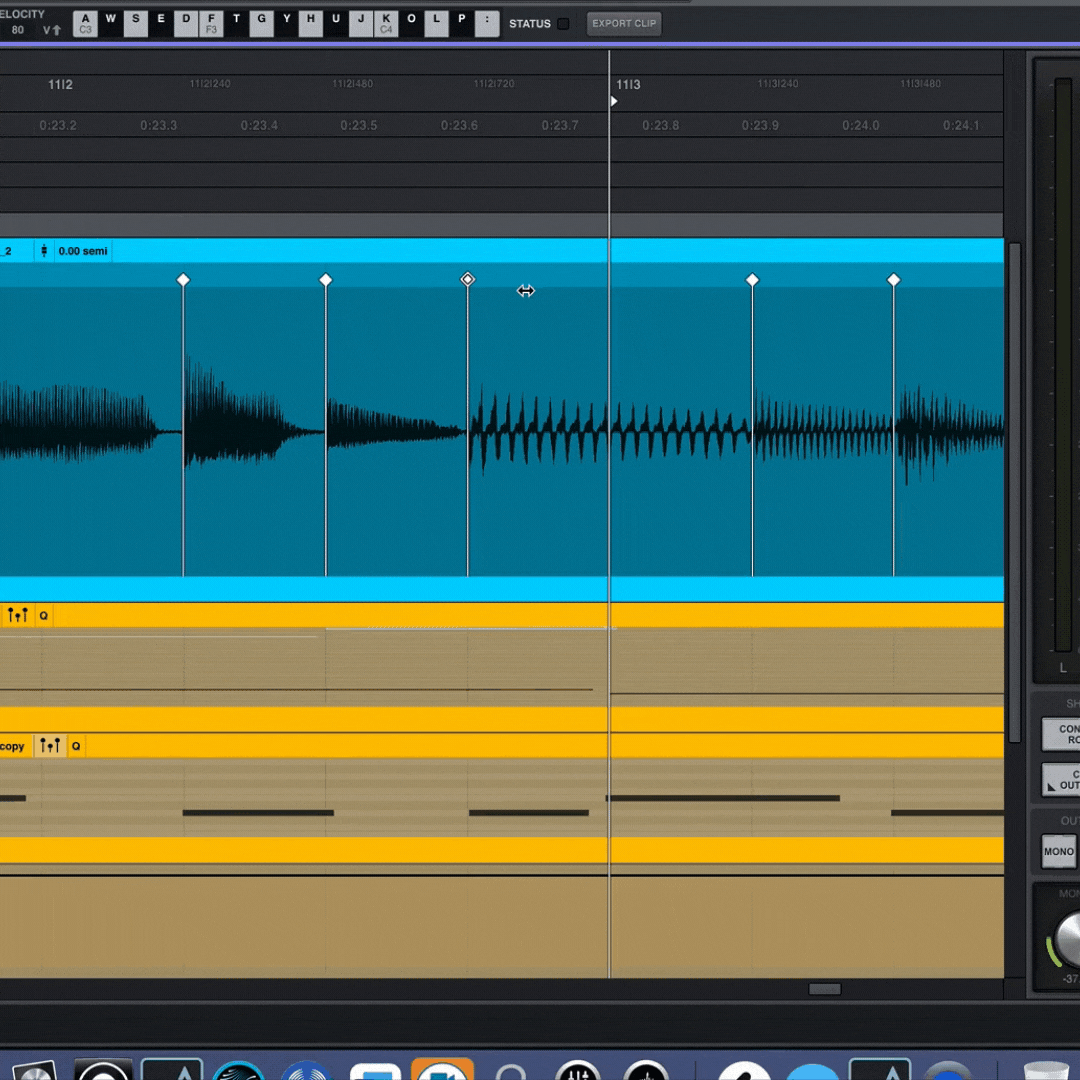
Audio Editing
This can get a little bit more advanced. However, most DAW’s make it easy enough to fix the timing in your performance to make it feel “in-the-pocket.”
This simply means that it is playing to the BPM that you have determined within your DAW.
Adding Additional Vibes
If you want to take your songwriting to the next level, you could add some additional sonic elements.
This could be as simple as adding some light percussion to create movement or a lead melody from a complementary instrument.
If this is your first song, I would suggest you keep it simple and stick to your main instrument and voice.
Additional Tips:
- Keep your chord progression simple
- Don’t worry about perfection.
- Know your limitations
Step #2: Writing Your Song’s Melodies
Goal: Define your melodies
Now that we have our song’s vibe defined, we will begin writing our lead vocal melody.
Now in songwriting, some may recommend that you start with writing lyrics before your write melodies.
However, I’d argue that a song can thrive with sub-par lyrics, but not with a sub-par melody.
Creating a catchy and memorable song melody is the most essential part of songwriting.
It creates drama within the music, similar to a movie.
Think of how a song in a language you don’t speak can still make you feel happy, sad, nostalgic, or loved.
A good melody will rely on your ear and your musical intuition.
Like with any creative writing, it is difficult to give an exact rule because there is no single “right” way to write.
Go with what feels good in your gut and use your years of listening to music to guide you in this process.
Sing Gibberish
Try experimenting with recording gibberish over a loop in your digital audio workstation.
If you submit yourself to trying new things, you’ll undoubtedly stumble across something that catches your ear. Again, record everything because you never know when inspiration will strike!
This might be uncomfortable (even embarrassing) if others can hear you. But I promise if you can get past the awkwardness of letting loose, you will stumble upon some golden nuggets.
This method is used by a lot of modern hitmakers like Ryan Tedder of OneRepublic.
Melodic Shapes
It’s essential to switch up your melodies to create interest and intrigue with your listener.
The most important thing with melody writing is to keep it simple and singable. An easy to sing melody will be easy to remember.
Also, be aware of what type of melody shape you are creating from section to section.
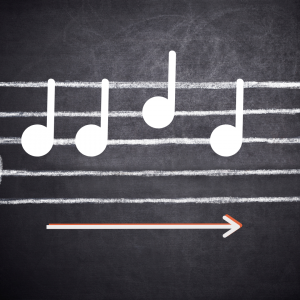
Ascending Melodies
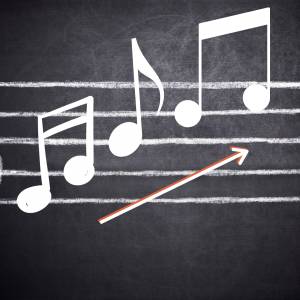
This will look just like it sounds; a melody that moves upwards. Since melodic melodies create a “lifting feeling,” they can be really effective for the ends of musical phrases.
Descending Melodies
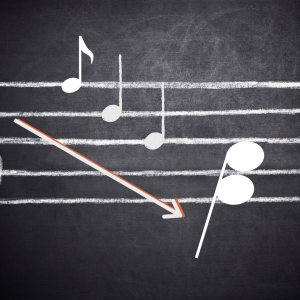
These types of melody have a downward movement and will create a “calming feeling.”
Think of a feather floating down from the sky, swaying back and forth.
This type of melodic shape can be really effective for the beginning or middle section of your musical phrase.
It can also be a great way to close out your song as this type of shape gives the feeling of resolution.
Static Melodies
Static melodies focus more on the rhythm and beat rather than the melody.
A single note will often repeat itself but have an interesting and catchy rhythmic element.
Zig-Zag Melodies
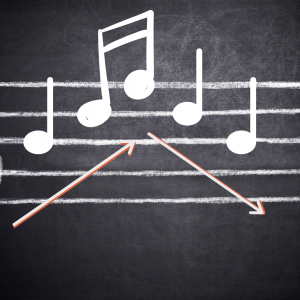
This can be really useful for subtly climbing up to a high note. You can add lots of rhythmic variation as well to give it the sound of a static melody and the movement of an ascending or descending melody.
Record Multiple Melodic Ideas
The best way to choose the melody for your songs is to write/record many ideas. Most often than not, you will find your chosen melody within multiple passes of ideas.
This isn’t the only way to write a good song, but it’s a fantastic way to make sure you have multiple fresh ideas and options to choose from.
Completion Steps: Define Your Melodies
Chorus Melodies
Your whole song will live or die by your chorus melody. A great chorus should instantly hook a listener and have them singing along by the second chorus.
This might seem intimidating, but it will jump out at you immediately when you stumble upon it.
You most likely have spent thousands of hours listening to music, and your musical intuition will let you know when a melody is good enough or not.
Verse Melodies
A great verse melody should be strong enough to be a chorus melody.
The dynamics (the contrast of your melody) are vital for deciding on a verse melody.
An excellent verse melody should support the chorus and make it feel more powerful when it arrives.
There are a couple of ways to do this:
- If your chorus is busy, then make your verse sparse or vice versa.
- Keep your verse notes low, and your chorus notes high.
What’s great about the verse is it’s usually the same melody from the first verse to the second verse. So you kill two birds with one stone.
The Bridge Melody
Think of the bridge as a detour in your song. Its main importance is to re-engage the listener and to make the last chorus pop.
By this time in your song, the listener has already heard essentially two melodies (if we stick to the most common song structure of verse/chorus).
So again, use dynamics and contrast to make your bridge hit like a “left hook,” so your final chorus is that knock-out “right hook” punch.
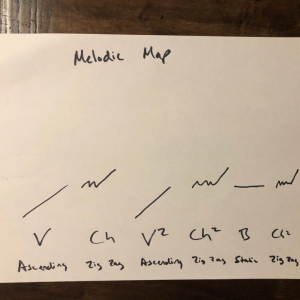
Review Your Melodic Map
By this time, you should have your melodies mapped out. It helps if you can see the notes laid out on a music staff or on paper. This will give you a visual idea of your song’s flow and see what the contrast is between sections.
If the music theory side of things intimidates you, then simply draw out your melody as a line.
Move it up if it ascends.
Move it down if it descends.
Move it straight if it is static.
Move it up and down if it is zig-zag.
Additional Tips:
Use Step-Wise Melodies
This simply means no more than a whole step between notes.
Write the Melody On a Piano or Other Instrument
Sometimes it’s easier to use another instrument to sketch out melodies. Give this a shot if you are feeling stuck.
Save Notes For the Chorus Melody
This can really make a chorus “hooky.” Dance around a particular note in the verse, then hit that note at the start of your chorus.
Start Melodies At Different Times for Each Section
Starting your melodies on different beats within the section is a great way to give your songwriting variety. It also makes your melodies more memorable.
Down Beat
If you are in 4/4, the count would be like:
“1, 2, 3, 4”.
The downbeat would be the 1.
This is the start of the measure and the most common starting position for a melody.
Up Beat
Again, let’s count in 4/4:
“1, 2, 3, 4”.
The upbeat would be the note in between those numbers.
So it would look like this:
“1, and, 2, and, 3, and, 4, and”.
And=up beat.
Got it? Good.
Ahead of Beat
This would be the reverse of the Up Beat or Down Beat.
The difference is this melody would lead into the next section.
The last bar of the section would be:
“1, and, 2, and, 3, and, 4, and“.
The bold is when the melody would start.
It could also start on the 4 for a very pushed (ahead of the beat) melodic phrase.
Step #3: Finalize Your Song Structure and Chord Progressions
Goal: Have your song arrangement and chord progressions completed
Congratulations, you are 80% of the way through how to write a song, and we are only on step three!
By this point, you have your song form and melodic ideas.
Now it’s time to map out your final arrangement and get it to a place where you can finish your song with lyrics.
Create a Musical Timeline
Ink it, don’t think it.
You’re free to record your song and melody in its entirety on your phone, or to use a Digital Audio Workstation to capture your ideas.
I would recommend using a DAW because you will have more options to edit your work as you move forward.
Listen Back With Fresh Ears
It’s important to take frequent breaks when you write a song. The law of diminishing returns sets in at a certain point, and you are probably making more bad decisions than good ones.

So go grab some coffee (or tea if that’s your thing) and get yourself into a conversation about something totally unrelated to songwriting.
This will help you reset your mind and help you be more productive when you start writing again.
Chord Progression Changes
When you come back from your break, listen through your entire song and see what sticks out to you in a negative way.
Maybe the guitar chords in the chorus don’t emphasize the melody properly. Or there’s one chord in the first verse that makes the whole arrangement feel too busy.
Don’t be afraid to edit and try different things at this point.
Chords can really change the feeling of melodies, so see if you can make what you have even better.
Melodic Changes
The same is true with the melodies. Listen to hear if the song flows from section to section.
It is one thing for melodies to sound good isolated, but it’s another thing for every piece of your song to be working together as a whole.
If one part doesn’t seem to be working, experiment with some new sounds and notes to get it to where it feels right.
Completion Step: The Gut Check
Now that we have made the final tweaks to our arrangement and melodies, it’s time to take another break.
Take 15 and come back with some fresh ears.
Listen Back and Do Another Gut Check
Listen to your whole track again and make sure everything feels right and is close to what you want to hear.
Again, we aren’t looking for perfection. If it is feeling good then move forward.
Get Outside Feedback
This one can be tough, but probably one of the most helpful songwriting tips in this article.
It’s not easy to let someone else into the creation of art, especially if you have been working hard at it for some time.
You will tend to fluctuate between two feelings when you write a song:
- This is a smash hit song!
- This is absolute garbage!
When you get someone’s outside opinion, it helps break you out of your internal feedback loop. It also usually results in getting some of the best advice on what is working and what you need to fix
Trust me, go do this with humility and grace.
Additional Tips:
Use Common Song Structure
The most common song structure is going to be:
- Intro
- First Verse
- First Chorus
- Second Verse
- Second Chorus
- Bridge
- Last Chorus
If you are a beginner songwriter, I would suggest sticking with this format for your song.
Sometimes throwing in a pre-chorus (a section between the verse and chorus) is needed to really ramp up the tension for the chorus.
However, this extra section will increase the song length and complexity of your arrangement.
Only add it if it serves the song.
Pop Song Length
Pop songs hit their sweet spot at about 2 minutes and 50 seconds.
There are always exceptions to this rule, but people have short attention spans and find most new music in playlists where it’s easy to hit the skip button.
So it’s generally a good rule-of-thumb to shoot for your song to be shorter than longer.
If you stick to the above structure, then your song will probably come out around the 3-minute mark.
Step #4: Write Lyrics
Goal: Finish Lyrics
“The verses are the blues, the chorus is the gospel.” – Bruce Springsteen.
Define the Characters
Figure out who the characters are in your song.
Remember, not all songs have to be written from personal experience.
There are generally two types of directions that a song can go:
- A person is talking with another person.
- A person is talking to humanity.
A simple love song is an example of person to person.
While a protest song would be an example of a person to humanity.
Person to person is generally easier for beginners. You can draw from your personal experience and the ideas in the song are usually more universal and easier to convey.
Person to humanity can be more complex in its themes and topics. This might be challenging for writers to simplify into clear poetic words.
Know your limits and write within your strengths.
Define the Scenario
Once you have defined the characters, you need to put them into a scene.
Use the arrangement you have developed to inspire pictures in your mind and feelings in your heart.
Also, try and answer some of these questions to help guide your writing.
Where is the main character?
What season is it?
Are they alone or around people?
Who are they singing to?
What message are they trying to communicate?
These questions should help guide you into a launching-off point for your lyrics.
Write the Title
The title is your central idea for the song.
For most songs, it is an elementary word or phrase.
“Let It Be”
“Shake It Off”
“Where Have You Been?”
Often, the title might not have a lot of meaning when it stands on its own.
However, your working title is the theme of your song, and every lyric should build more meaning into it.
If a lyric doesn’t make sense under the title, then you need to edit it out.
Create the Questions to Be Answered

The title should provoke a question within the listener.
Sometimes the title is a question.
Example: “What’s my age again?” by Blink 182.
Others might invoke a question within the mind.
This is similar to Action Step Two, but instead of using questions to flesh out the environment in which your story lives, this question should be central to your song’s theme.
Define a question that your song title provokes, and use that question as a basis for your lyrics.
Think of a question that is intriguing about your title.
Also, these questions create “narrative loops” and will give your lyrics a better chance of engaging your listeners.
Remember, a good song is a good story.
Keep it Conversational
When writing lyrics, it’s essential to keep your song conversational and straightforward.
If you can’t make your lyrics clear in a spoken word format, then they are too complicated for the average listener.
Avoid words or themes that are too complex to be understood by someone on first listen.
Remember, If it feels awkward to speak, then it will be awkward to sing.
The Lyrics

Here are some best practices for lyric writing in different sections of your song.
Verse Lyrics
The verse lyric is where you will fill in details of the story and have the most creative liberty with the words.
These words can be more indirect, as long as they make sense in context with the chorus lyric and bridge lyric.
Remember, every verse lyric should push the story towards the chorus.
I’m a big proponent of trying to make the first verse lines as compelling as possible.
If your song title doesn’t create a specific question on its own, then the first verse opening line should invoke that question.
Make sure that the words of the verses are creating a deeper context for the chorus.
Also, try using popular rhyming schemes like every other line (ABAB) or back-to-back lines (AABB).
Chorus Lyrics
The chorus lyric is the climax and heart of your song. Try writing a chorus lyric that leads to the title of your song (the main hook).
When every line that came before the song’s hook has been in support of that hook, you can turn a simple phrase into something that has a lot of meaning and impact.
Think Coldplay’s “Fix You.”
Bridge Lyrics
A bridge can help create a change in tone or feeling within the music, but, more importantly, it’s an opportunity to add more drama before the final chorus.
The bridge lyric should bring a different angle to the song’s story and give more insight into the song’s central idea.
Completion Step: Record the Lyrics
Record your lyrics to your melody and then take a break.
Come back to your music with fresh ears and make any final adjustments.
You now have completed your song!
However, we want to publish this song because what’s the point of making it if we don’t share it with the world!
Additional Tips:
When you write a song, the lyrics can be one of the most challenging parts of the process.
Don’t be afraid to use external tools to help you.
My recommended tools are:
- Thesaurus
Bookmark a thesaurus in your browser and use it often!
- ChatGPT
ChatGPT is a generative AI tool from OpenAI that is surprisingly great at creative writing. You would be amazed at what it will produce for you.
Also, it’s royalty-free!
Step #5: Release Your Song
Goal: To publish your song on Soundcloud
We have a finished song!
However, we want to take this one step further and publish this song for the world to hear!
Add Any Additional Parts
As you write your song, you probably heard other arrangements and harmonies that would benefit the music.
Add any songwriting ideas to enhance your song if you desire.
Mix Your Song
Mixing songs isn’t as complicated as it sounds.
You can break down mixing into three stages:
All DAW software will have tools available for you to use.
Master Your Song
Mastering is a complex art form that takes a very refined ear.
For simplicity’s sake, we will equate mastering with loudness.
Look in your DAW’s plugin folder for something called a “Limiter” and use that to bring up the overall loudness of your track.
Completion Step: Publish Song
Create a Soundcloud account and upload your masterpiece!
Additional Tips:
Don’t worry about perfection as songwriting is a lifelong journey. You will write many bad songs before you start to write good ones.
However, with this said…your song is probably much better than you think. I’ve let my own insecurities keep me from finishing and releasing songs many times.
There is nothing worse than listening to a song you were working on years earlier and realize you self-sabotaged a perfectly good song.
Don’t let this happen to you. Release your music, and then write another song!
What to Do Next?

Learning how to write your song is the first step. If you want to take your songwriting to the next level, then you have to capture your ideas.
The fortunate thing is you don’t have to spend a lot on a home studio these days to capture great ideas.
I’ve created a resource for songwriters, musicians, and music producers on how to create a home studio on any budget. You can check it out here: The Ultimate Guide to Building a Home Studio on Any Budget
Happy songwriting!