
In this article, we’ll go over everything about building a home studio on any budget so that you can make an informed decision when creating your own space.
Let’s begin…
Table of Contents:
Table of Contents
Is Building a Home Studio Worth It?
To be honest, this is a loaded question.
Today, it takes a minimal financial investment to get started with a home studio. It’s easier than ever before.
However, you will still need to invest an incredible amount of time to get results that you are happy with.
If you enjoy learning new technology and endless tinkering, then a home recording studio could be an excellent investment for you.
If you want to only write and play music, then finding someone else with a studio and paying them for their time would be a much better use of your resources.
Studio time with a skilled engineer can get expensive. However, it is your only “shortcut” for producing radio-ready songs if you are just beginning in the world of pro audio.
Also, no equipment, engineering skills, and ear-training software will teach you how to write a good song.
If you are a songwriter thinking about investing in a home studio, but you are still struggling to finish your song, keep writing.
I’m not trying to discourage anyone from building their own home recording studio. It is, in fact, an enriching experience. I just want to be genuine with my readers and be clear that it isn’t for everyone.
If you are deadset on going down the home studio route, keep reading this article, as it will help point you in the right direction.
How Much Does it Cost to Build a Home Recording Studio?
A home recording studio setup can come in many different styles and price points. You could spend as little as $200 or over $10k if you are very particular and have some extra money to spend.
A home studio setup can range from a simple cellphone to a professional-grade studio with all the bells and whistles.
Most people, however, will fall somewhere in between these two extremes.
A healthy budget for a very functional home recording studio would be $1,500.

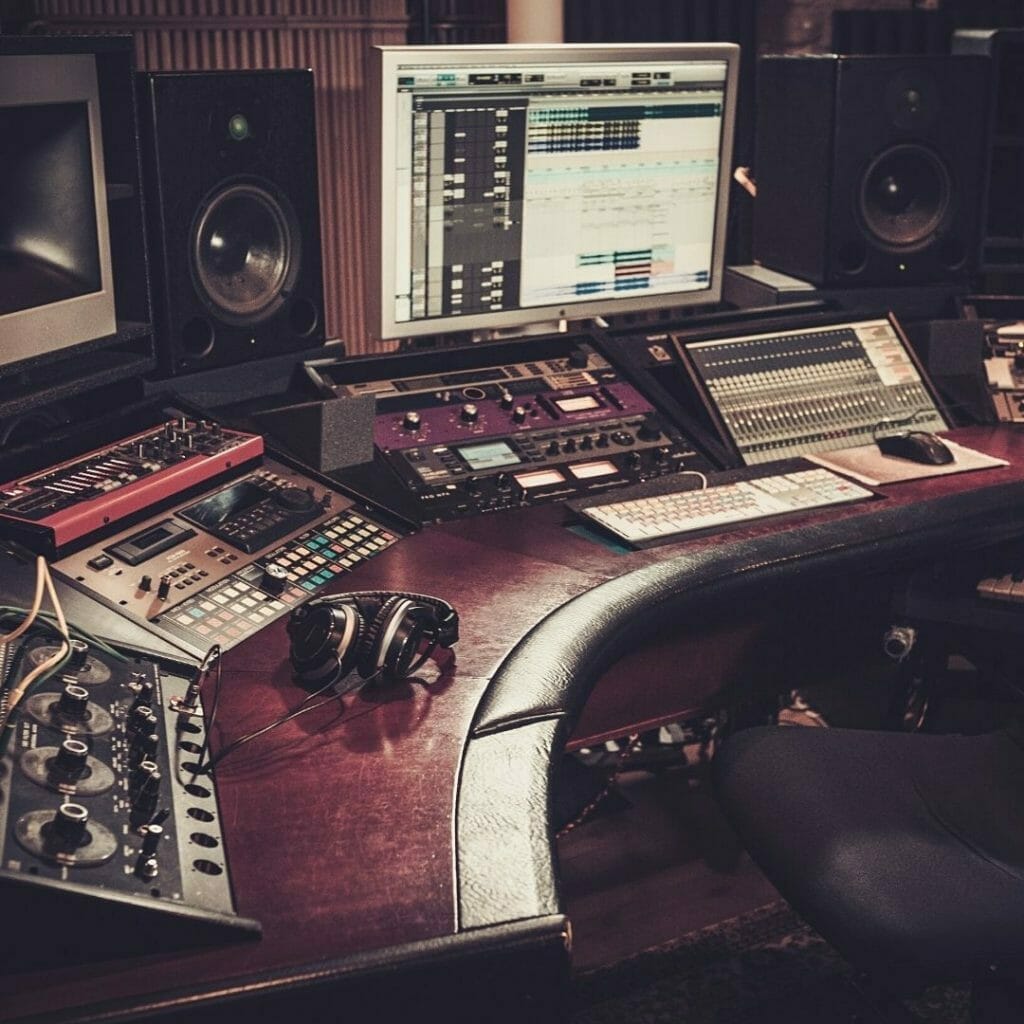
Your Studio Computer
Let’s start with the most common gear that people need when building a home studio: Your Computer.
Word to the wise: If you already have a computer, then use it. In the beginning, you don’t need to invest in the fastest computer. Most modern computers can handle basic recording tasks.
Powerful computers come into play when you start to record larger ensembles, mix large track counts and use many virtual instruments and plugins.
Do You Need a Mac or PC?
The question is more complicated than it seems on the surface. There are some key things to consider first:
1.) Affordability – PCs reign supreme in this department. If you are on a budget, then start looking at a PC.
2.) Ease-of-use – Macs have the edge here because of their intuitive interface and closed-system approach.
3.) Software compatibility – Music manufactures favor Apple products. It’s a fact of life that you should get used to as an upcoming bedroom studio artist. Some great products only work on Mac’s operating system.
Desktop or Laptop?
Many laptops can get the job done for recording music. Laptops are my preferred choice for music recording because you have the freedom to record in different locations. Also, if you travel quite a bit, you can bring your studio with you.
However, desktops generally have more storage, power and can be more affordable. The only downfall is you are locked into the room that your computer is located.
After deciding what type of computer you want, the next question is how much power do you need?
Processor Speed
When choosing your computer’s processor speed, the first thing to consider is to define what type of music you will be making in your home recording studio. For example, suppose you are a singer-songwriter planning on recording only vocals and a guitar. In that case, you will not need super-fast processing.
In general, audio files are more manageable for your computer to handle than virtual instruments.
So if you are making electronic music or beats that rely heavily on virtual instruments, you might need something with more power.
RAM
In my opinion, Random Access Memory (RAM) is more important than processing speed. The minimum amount of RAM you should consider for your computer is 16GB. However, get as much as you can afford.
Graphics
A powerful graphics card isn’t something to ignore. Still, for home recording studios, it doesn’t offer the same benefits that it does when you are gaming.
If you can afford a better one, then great, but I would recommend purchasing a higher processing speed and more RAM first.
SSD Storage
Solid State Drives (SSD) are great because they load fast and have no moving parts. They also consume less power when in use.
A Solid State Drive is something that you should look into when purchasing any computer for recording music. An SSD Drive performs better than a hard drive.
If you have the extra budget, I’d recommend opting for a 1 TB drive. Your computer may be used for more than just your project studio needs. The additional storage can come in handy when you take on a few projects at once or need to store other types of files.
The 4 Levels of a Home Recording Studio
Let’s dive into the different types of home studio setups for every kind of budget and need.
#1 Barebones Studio
($150)
A barebones home recording studio is essentially your computer and not much else.
You can use a free digital audio workstation (DAW) that comes with either your Mac (Garageband) or PC (you can download Audacity for free).
These DAW’s will come with free plugins and virtual instruments so you can get started making music right away.
Phone Microphone
With a barebones studio, you don’t need to invest in a proper microphone. You could get away with a microphone that plugs into your phone if you want to get a cleaner recording.
This is perfect for musicians who play an acoustic instrument and/or sing. The only downfall is that your rhythmic timing might not be the best with this method. As a result, you’re going to get a high-quality demo (or high-quality lo-fi) sound at best.
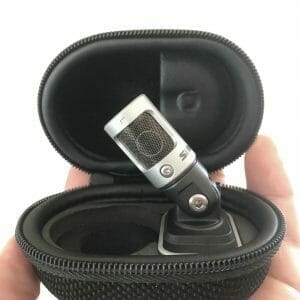
A great option that I personally use for getting better phone recordings is the Shure MV88.
#2 Beginner Studio
($500 – $1500)
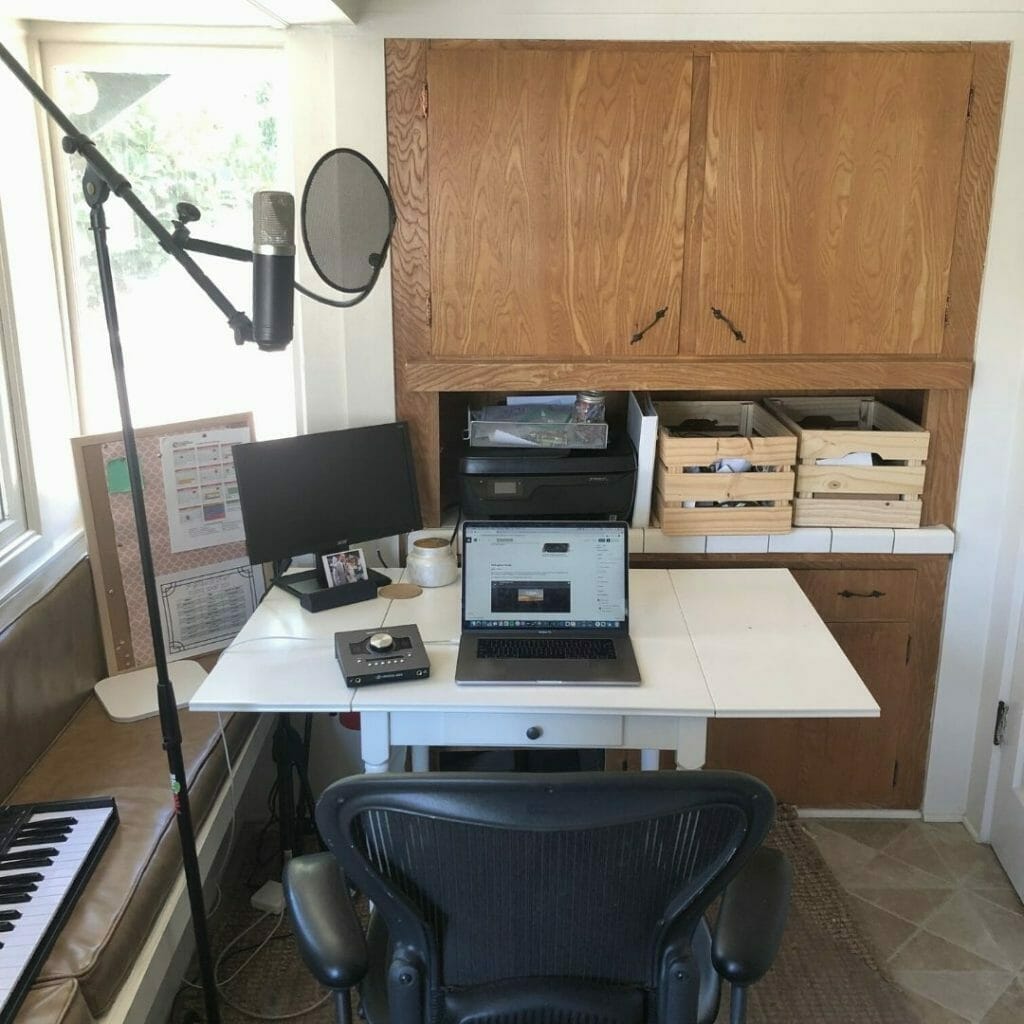
Ok, time for some transparency. This is the kind of home recording studio I work out of now. It’s misleading to call this a “beginner studio” because you can get professional results with this setup.
For reference, check out my song “Beginning of June” now.
Audio Interface
An audio interface is one of the most essential purchases for your home recording studio setup.
An audio interface takes the recording input from your microphone or instrument. It converts the analog signal into a digital signal. It then sends the digital signal to your computer.
It also turns the digital signal in your computer and back into an audio output signal for your speakers or headphones.
Audio Interfaces are also equipped with recording preamps, internal line-ins for synths, and some have monitor controls.
The market for audio interfaces is vast. They can range from $100 to upwards of $3500.
The primary consideration for an audio interface is how many inputs do you need to record your music.
Inputs = Microphones/Recording Paths
If you are a singer/songwriter, you could reasonably get away with a one or two-input audio interface.
If you plan to record drums or a live band, you will need to get something in the 8 channels or more range.
Generally speaking, the more channels, the more expensive your audio interface will be.
There are plenty of great recording bundles that will get you up and running quickly. For my roundup of the best, please check out my article here.
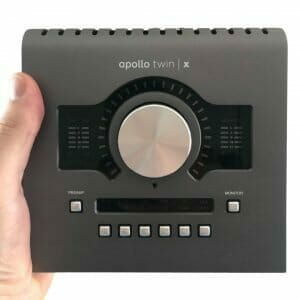
For my overall recommendation, I would go with Universal Audio’s Apollo Twin X audio interface if you have a bigger budget, want more flexibility, and get access to premium plugins.
Sample Subscription
Samples are a great way to start making music right out the gates. Some DAW’s have a library of royalty-free samples you can use to start making music. However, investing in an excellent third-party sample subscription, like Splice, can quickly get you to access inspirational sounds.
Microphone
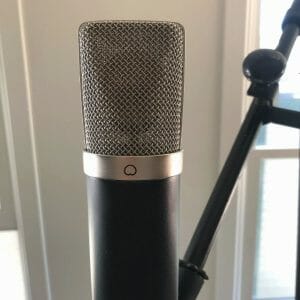
If you plan to record your vocals or an acoustic instrument of some sort, you will want to invest in a decent microphone.
Microphones, like audio interfaces, come in many types and price ranges.
The challenge with choosing a “good microphone” is that each microphone comes with its own sonic color. These colors may or may not complement what it’s recording.
For example, you purchase a condenser microphone that boosts the top end to give more brightness. This effect could work great in a female vocalist to provide the singer with a more airy presence. However, put it on a baritone, and you might accentuate the wrong frequencies of that type of voice, making it sound unnatural and weird.
For another example, let’s say you have the same microphone and record an acoustic guitar. Again, the accentuated high end might bring out the finger and fret noise that is undesirable.
Getting a microphone that isn’t optimized for the performance doesn’t mean you won’t get a good recording. You just will have different problems with the recording that you will have to address later.
This is my #1 complaint about cheap microphones (especially condensers) is that manufacturers tend to mess with the frequency response in the high end to give more excitement to a recording. However, this can often make the source sound brittle, thin, and irritating.
The point I’m trying to make is this: If you have the luxury of testing out different microphones (see if anyone in your area rents them), then it’s worth your time to do so.
If you don’t have the luxury, then a couple of solid options are Warm Audio’s microphones. They are slightly more expensive but are of excellent quality.
If you’re looking toward the future of audio, then Townsend Labs Sphere L22 is the microphone for you. It digitally models multiple types of microphones and will quickly give you the perfect microphone for your source and be of a high professional standard.
If you have some soldering skills (or want to learn), you can also buy a microphone kit and build a mic yourself. This can give you a high-quality microphone for an affordable price.
Pop Filters
A pop filter is as it sounds. It filters out the “pops.” These are also known as plosives, and they create problems with a recording.
A pop filter is essential for getting a clean vocal recording and is relatively cheap. Pop filters also last forever if not abused.
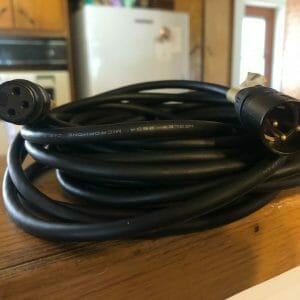
XLR Cable
Audio cables are not the most exciting thing to buy but an absolute home recording necessity. An XLR cable is how you are going to plug your microphone into your audio interface.
If you read through different forums, you will discover many schools of thought on the quality of XLR you should consider buying.
Honestly, unless you are wiring up a pro studio, you can buy a budget XLR and do ok.
Again, if you have soldering skills, you can always make your own for dirt cheap. When you go this route, you can source all the parts of super high-end cables and get the best of both worlds regarding quality and cost.
Microphone Stand
Similar to the XLR cable, you’re going to have to make this boring purchase.
Here is a rule of thumb with microphone stands:
Get a mid-priced mic stand for most recording applications. This includes:
- Vocals
- Guitars
- Amplifiers
Get a high-end mic stand if you need to place the microphone over an instrument. This includes:
- Drum Overheads
- Choirs
- Pianos
The reason for this is you don’t want your microphone to shift and/or fall on your source. Generally, high-end stands will be more stable and secure when put into awkward positions.
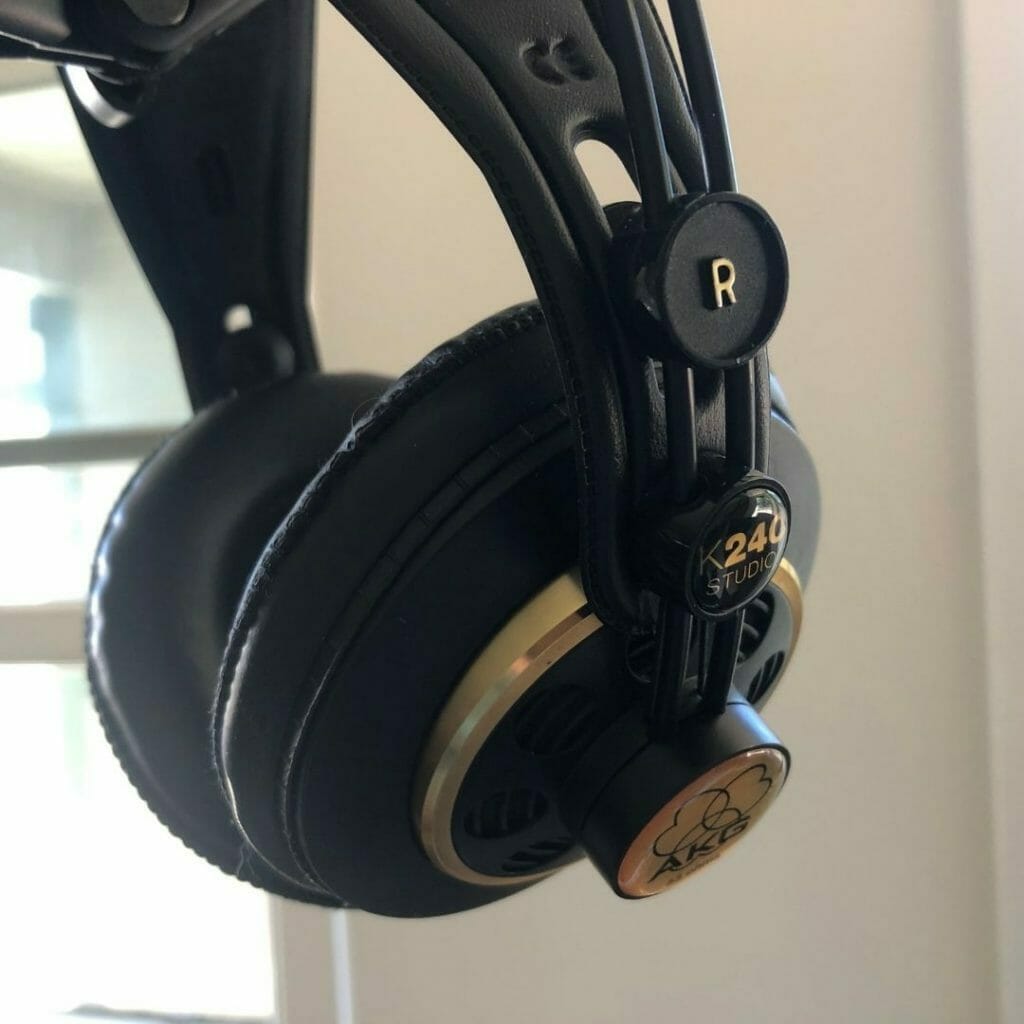
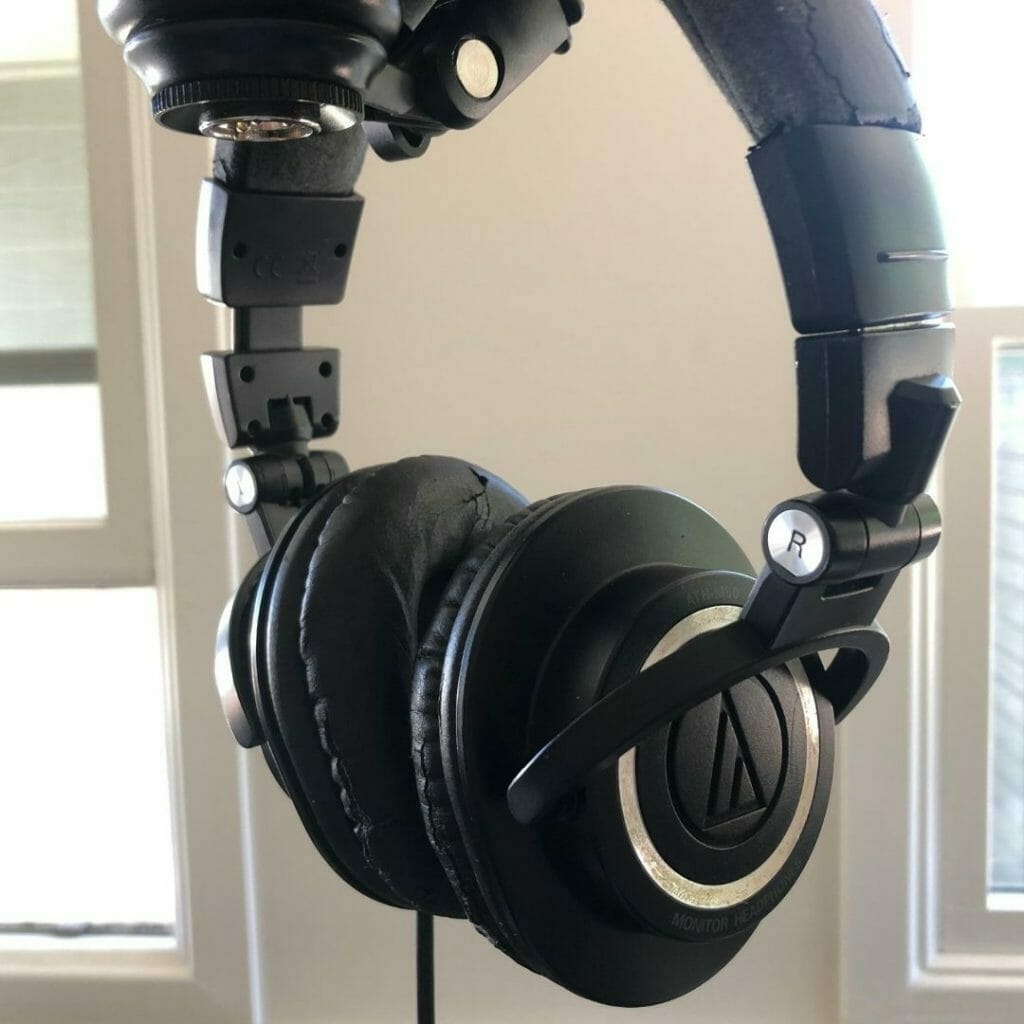
Headphones
There are two types of studio headphones that you should consider purchasing:
- Open-Back
- Closed-Back
Open-back studio headphones have a more expansive sound stage and more detail. However, they let the sound out (bleed) like crazy. So they aren’t great for recording but can be great for mixing.
Closed-back studio headphones have a smaller sound stage but don’t bleed as much. So these types of headphones are great for recording.
For beginners, or musicians on a budget, the AKG k240’s are fabulous open-back headphones, and Audio Technica M50x for closed-back is an excellent option.
#3 Project Studio
($1500 – $5000)
A project studio is a home recording studio that is fully functioning but is still generally low-cost. The following studio equipment will be building upon what we discussed in the previous section.
This type of set-up is great for an up-and-coming engineer or those who do overdubs for tv and film.
A Premium Digital Audio Workstation (DAW)
Now would be the time to invest in a paid DAW when you are investing in a project studio.
I’ve worked on many different digital audio workstations, and each has its advantages and disadvantages. So I wouldn’t necessarily say there is one DAW better than the other; they are all just different.
It all depends on what you are looking for in your home recording studio setup.
Here are some of the most popular digital audio workstations and why you would choose one over the other.
Avid’s Pro Tools
Pro Tools is the industry standard for digital audio workstations; however, it is often not the best DAW for most home studio musicians.
When it comes to pure audio editing, Pro Tools is the leader of the pack. It’s also very stable for multi-track recordings and scalability.
If you’re looking to expand this passion into a full-fledged career in audio, then learning Pro Tools is a must.
Pretty much every professional studio is equipped with Pro Tools. Also, if you want to collaborate with another producer or engineer, then using Pro Tools makes this easy with their Cloud Collaboration feature.
Apple’s Logic Pro X
Logic Pro X is another popular DAW, especially if you’re a music producer. Logic is feature-rich and has tons of great virtual instruments, plugins, and unique creative tools that are a music producer’s dream.
Logic Pro X is also a very affordable DAW that Apple does massive updates for at no additional cost.
Suppose you are a home recording artist who wants to explore, develop, or expand your sonic palette without sacrificing audio editing and multi-track recording features. In that case, Logic Pro X is an excellent option for you.
The biggest downside of Logic Pro is that it’s Apple only. So if you have a PC, you will have to look at other DAWs.
Ableton Live
Ableton Live is an excellent DAW that many producers use to create hip hop, EDM, and other styles of dance music. In addition, it’s the standard for DJs and running sequencers for live performances.
Ableton has a strong “loop-based” focus on the production of music. This approach works great for remixing, sampling, and coming up with creative song ideas.
The downside to Ableton Live is that it tends to need a faster computer to operate on. It also gets costly when you purchase the full version.
FL Studio
Once known as Fruity Loops, this DAW has come a long way. It’s more of a competitor to Ableton Live than Logic or Pro Tools. Nevertheless, electronic Music producers find the workflow of FL Studio to be fun and fabulous for beat making.
It has different payment tiers, but they never charge you for updates. This is a huge bonus because it’s never fun having to pay for your tools twice.
However, the downside of FL Studio is it’s not an optimized DAW for live recording and mixing audio.
Studio One
PreSonus Studio One has become a favorite in home studios. It combines a more traditional recording approach that Pro Tools is famous for and the sequencer-based workflow of Ableton Live or FL Studio.
Studio One also comes with a built-in mastering suite, plugins, virtual instruments and can even upload to Soundcloud from the application.
It’s a forward-thinking DAW that is worth checking out.
Reaper
Reaper is known for efficiency. It’s fast and can handle lots of plugins and virtual instruments without crashing.
It’s also highly customizable and very affordable. Reaper also comes with a great feature of universal tracks. A universal track isn’t broken into an “audio track” or a “midi track.” Instead, Reaper treats all tracks the same.
The downside to Reaper is that it is so customizable that it can become a giant rabbit hole for people.
Also, MIDI can be complicated to use in Reaper, and the learning curve can be steep for some.
Propellerhead’s Reason
Propellerhead’s Reason is an audio-tweakers dream. It has a rack-gear flow, and you patch together equipment with virtual cables like you would do in real life. This makes the customization of the plugins endless.
It can teach you while also inspiring you.
The virtual instruments in Reason sound incredible and is an excellent platform for discovering new sounds and vibes.
The downfall of Reason is that there is a learning curve with the patching system, and to take complete control of its power may be hard to understand for beginners.
Although it does some audio editing very well (time-stretching for one), it isn’t great for multi-track editing.
UAD’s Luna Recording System
Universal Audio’s Luna is the new DAW on the block. It’s arguably the best-sounding DAW on the market.
Universal Audio is known for modeling classic vintage gear to make very realistic plugins. They took this one step further in Luna by creating an end-to-end emulation of a traditional recording path.
Simply, recording in Luna makes your songs easily sound like a record.
However, it isn’t without its drawbacks. While there is an impressive amount of features in Luna, it still lacks some basics found in other DAWs.
It’s also only supported on Apple Computers at the moment, and you must have a Universal Audio Apollo interface to use it.
Luna does come free with the purchase of an Apollo, but the add-on extensions to unlock its true power make this DAW one of the most expensive on the list.
Studio Monitors
Having good studio monitors helps you “see into your music.” Studio monitors open up the stereo field of music in the following ways:
- Depth (front to back)
- Width (side to side)
- Height (up and down)
Suppose you’ve never listened to your music on a set of good studio monitors. In that case, you are missing out on hearing the necessary details within your recordings.
Out of all the studio equipment you buy for a project studio, studio monitors are the most necessary purchases.
The price range and design of studio monitors vary immensely and range from $500 a pair to $20,000+.
There are great monitors in all price ranges, you just have to know the give and take of speakers.
Discussing all the nuances of speaker design and sound profiles is beyond the scope of this article.
I’ll break down the key things to look for in monitor design, and I’ll leave the budget up to you.
- Get nearfield monitors
- Avoid bass ports if getting cheaper monitors
- If you are in a smaller room, get a smaller speaker
If you are on a budget, the Yamaha HS5s are great studio monitors.
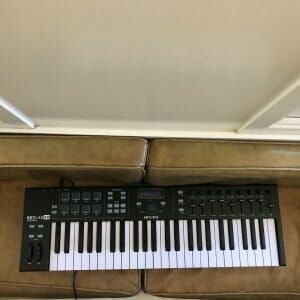
MIDI Keyboard
A MIDI keyboard (also known as a MIDI controller) is a keyboard that sends digital commands to your DAW.
Basically, you send off “events” with the controller by pushing buttons or turning knobs. These events are recorded in the DAW software as MIDI data.
A MIDI Keyboard doesn’t produce any sound on its own.
A good MIDI keyboard will help you be more expressive and dynamic while playing VST’s like a piano, drums, or synth.
MIDI keyboards come in many sizes and functionality. I’d recommend getting something with at least 49 keys, and this gives you access to four octaves. Anything less can be limiting, in my opinion.
Also, If you are used to playing acoustic piano, you will want to look at a MIDI keyboard with weighted keys to give you the same type of feel.
Acoustic Treatment
Suppose you skip acoustic treatment in your recording space. In that case, you are doing a massive disservice to all the other recording equipment you’ve invested in.
The physics of sound is way too big of a topic to cover in this article. However, it messes with the way you accurately hear music in your room. This will lead you to make bad decisions with mic placement, mixing, and mastering.
These bad decisions will make your music not “translate” to other listening environments. What you think sounds good in your room will sound like garbage elsewhere.
Some may suggest never buy foam sound absorbers as they are a “snake-oil product.”
I disagree entirely.
I’ve had both custom sound absorbers and the Aurlex Roominator treatment kit, and they both got the job done.
Just know that if you want an out-of-the-box sound treatment solution, you will pay big $$$ for it. So it’s a much cheaper (and slightly better) route to build your own.
The important thing for a home recording studio is to have effective bass traps in all four corners and at least a panel or two at a sound’s first reflection point.
#4 Professional Studio
($5000+)
Some of you will want to turn your project studio into a professional studio. So I will briefly touch on the following stages of development to create an environment that wows your clients.
Tracking Room
Creating a separate tracking room from the control room (listening room) is the most optimal and efficient way of getting a quality recording.
Tracking rooms tend to have different acoustic treatment needs from a control room. For example, a tracking room wants a more “lively” sound, while a control room wants a more “controlled/balanced” sound.
It’s also way easier to make micing decisions when you only hear the sound from the speakers.
However, you will need to have extra space for a tracking room and probably need to do some light to heavy construction to properly make one.
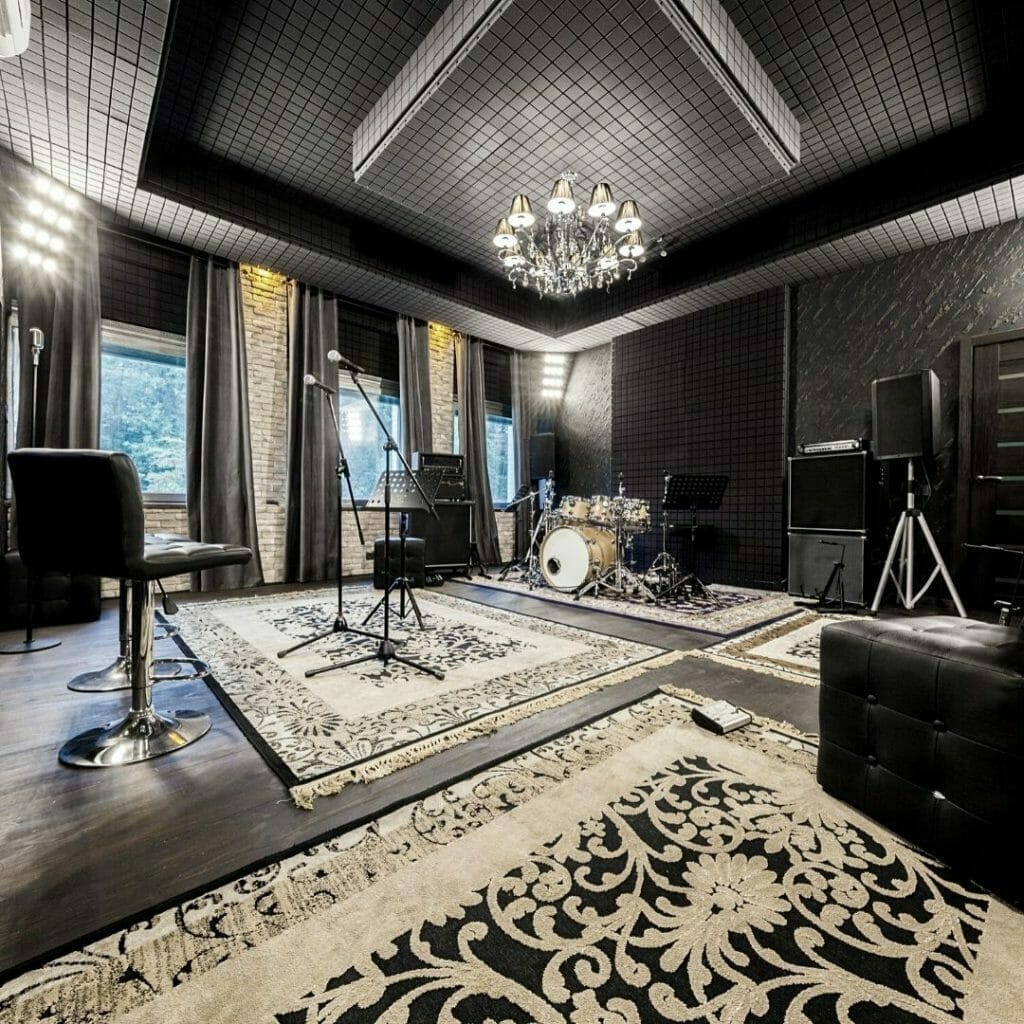
Instruments
Having quality instruments available in your studio will help you and your clients be more inspired during the tracking process.
Having the basics like an acoustic piano, drums, electric guitars, bass, and percussion, to name a few, is something a professional studio shouldn’t be without.
Second Pair of Monitors
Being able to flip between different monitors can really help speed up your decisions while tracking and mixing.
Your ears will adjust to what you’re hearing quickly, and having a second set of speakers will keep your listening objective and in check.
Beware of Gear Acquisition Syndrome (GAS)
Home studio recording equipment quickly becomes a slippery slope. It’s really easy to start believing in all the marketing hype and thinking you need that $2,000 preamp or shiny new plugin to make great music.
Before you know it, months go by, and you don’t have a song to show for any of your purchases.
There is nothing wrong with wanting gear, but if you are new to recording, focus on your music first.
Only make purchases when it makes sense to do so. You will know what the right investment is as you go through the process of creating music. Then, you will hit roadblocks or inefficiencies that will become apparent. When this happens, then go looking for the right solution.
One of the best investments is to invest in people and not gear. Services like Musiversal make it easy and affordable to have high-quality musicians come alongside your music productions, making building your own home studio seem less daunting.
What to Do Next?
Building a music recording space means nothing if you aren’t writing great music.
I’ve created a great free resource called How to Write a Song in 5 Simple Steps that you should go read and repeat before investing in a home studio.
Studio equipment has gotten really affordable and of excellent quality. So if you practice your instrument and write good songs, budget equipment can make hits.
Now go take control over your music, and don’t let anything hold you back!